Netlify Identity Protects Ably Apps from Hackers
Developer Tutorial · Ably Realtime
How to use Netlify Identity and serverless functions to issue Ably JWT tokens to verified users only — keeping your API key out of your source code and bad actors permanently locked out.
A few weeks ago I saw this message in our internal support channel on Slack, and it made my gears grind:
The customer has responded to 703762824
Ticket Name: xxxxxxxxxxxxx - API Key Security breachPriority: Ticket
Description: Ticket raised as a result of a security report … to contact client to let them know and take action as their API Key was exposed in the Wayback Machine, and is still live.
There are people out there on the internet cheeky enough to freeload off your account and use up your monthly quotas. What's more: you may not know that it is happening.
How to ensure your Ably app gets hacked
Log in to Ably, copy your app's API key and paste it into your code, like this:
const ably = new Ably.Realtime('aBCdeFg.ABcDEfG:abc123def456....789xyz');
Then commit this line of code to a git repository, deploy it to production and the Wayback Machine will freeze it in amber. It is that simple. There it will wait until an eager little Hobbit finds it in the dark. Your precioussssss API key will be in the wrong hands.
Luckily, at Ably, we monitor authentication key leaks and contact the client.
Basic authentication is like a cat flap — any old cat can come into your house. Token authentication is like one of those with a chip reader: only the cool cats that match the chip's programmed VIP guest list can pass the flap test and get in.
Using Netlify functions to protect your app
This article shows you how to set up token authentication with very little effort. We will make an endpoint using a Netlify function that lets you do this:
const authUrl = '.netlify/functions/ably-jwt?id={user-id}';
const ably = new Ably.Realtime({ authUrl });
That looks great — no API key anywhere — but what's stopping someone on the internet from taking the authentication URL and using it elsewhere? Well, nothing. Token authentication will hide the API key, but that alone is not enough.
We also need a way to issue the token to valid users only. This is where Netlify comes into the picture. We can use their Identity services in conjunction with a serverless function, included in the free tier plan (at time of writing).
TL;DR
If you just want the implementation without the explanations, head over to the ably-labs Github repo, where the README is a condensed version of this article.
You will need accounts on:
Ably, Github and Netlify.
What is an "Ably" JWT token?
JSON Web Token (JWT) is an open standard (RFC 7519) that defines a compact and self-contained way for securely transmitting information between parties as a JSON object.
Typically an encoded JWT token looks like this:
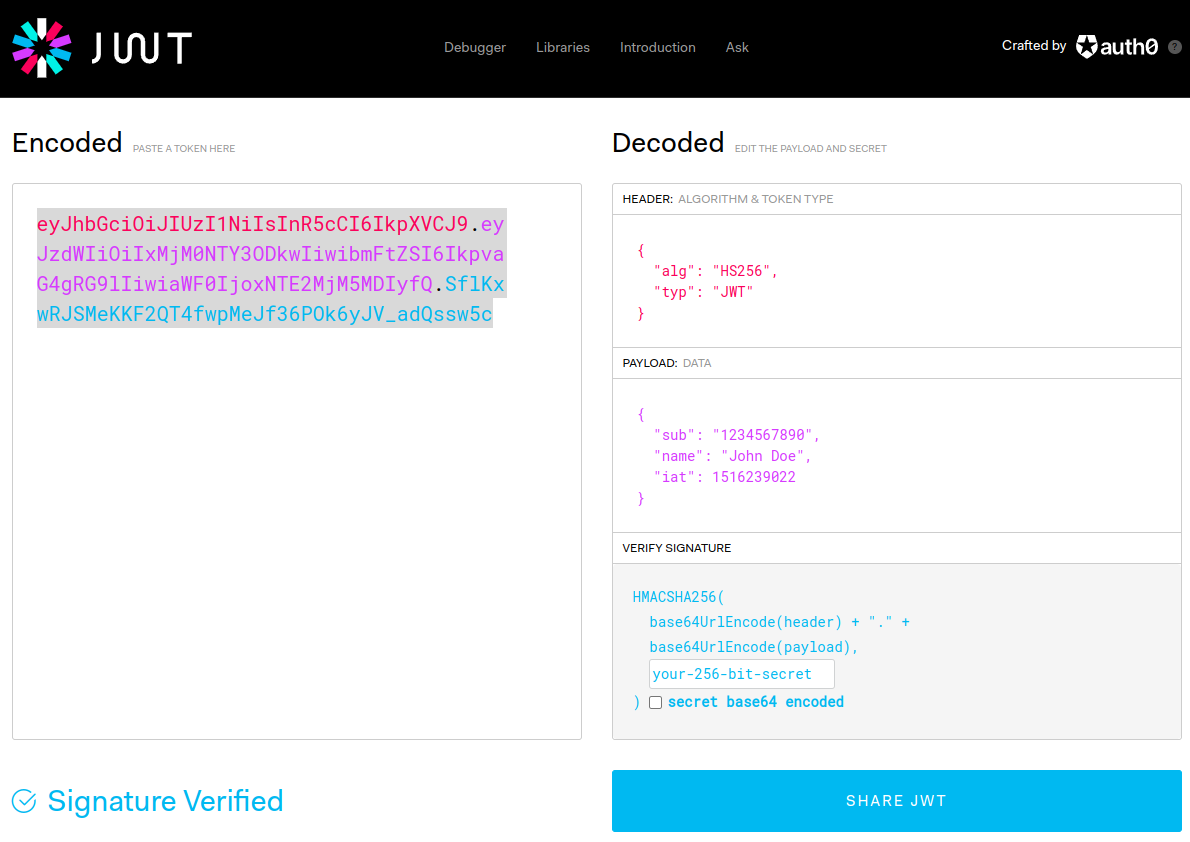
Try it at https://jwt.io/ — crafted by the folks at auth0
Token authentication is secure for two reasons: Ably JWT tokens are digitally signed and they expire regularly. Additionally you can monitor who is using your app whenever the token refreshes. When the JWT expires, the user is routed via your validation server and you choose whether or not to reissue their token.
An Ably JWT is not strictly an Ably construct, rather it is a JWT which has been constructed to be compatible with Ably. If you want to know in detail how it works, the best practice guide covers everything.
Netlify serverless functions & identity workflow
In our example app, a new user needs to register and confirm their email address to activate themselves before they can log in. At login, we validate them with Netlify Identity and check that they have not been flagged as Banned. Bad actors are not issued with a JWT token. Valid users are issued a token to authenticate with Ably, and the auth URL carries their unique ID within it.
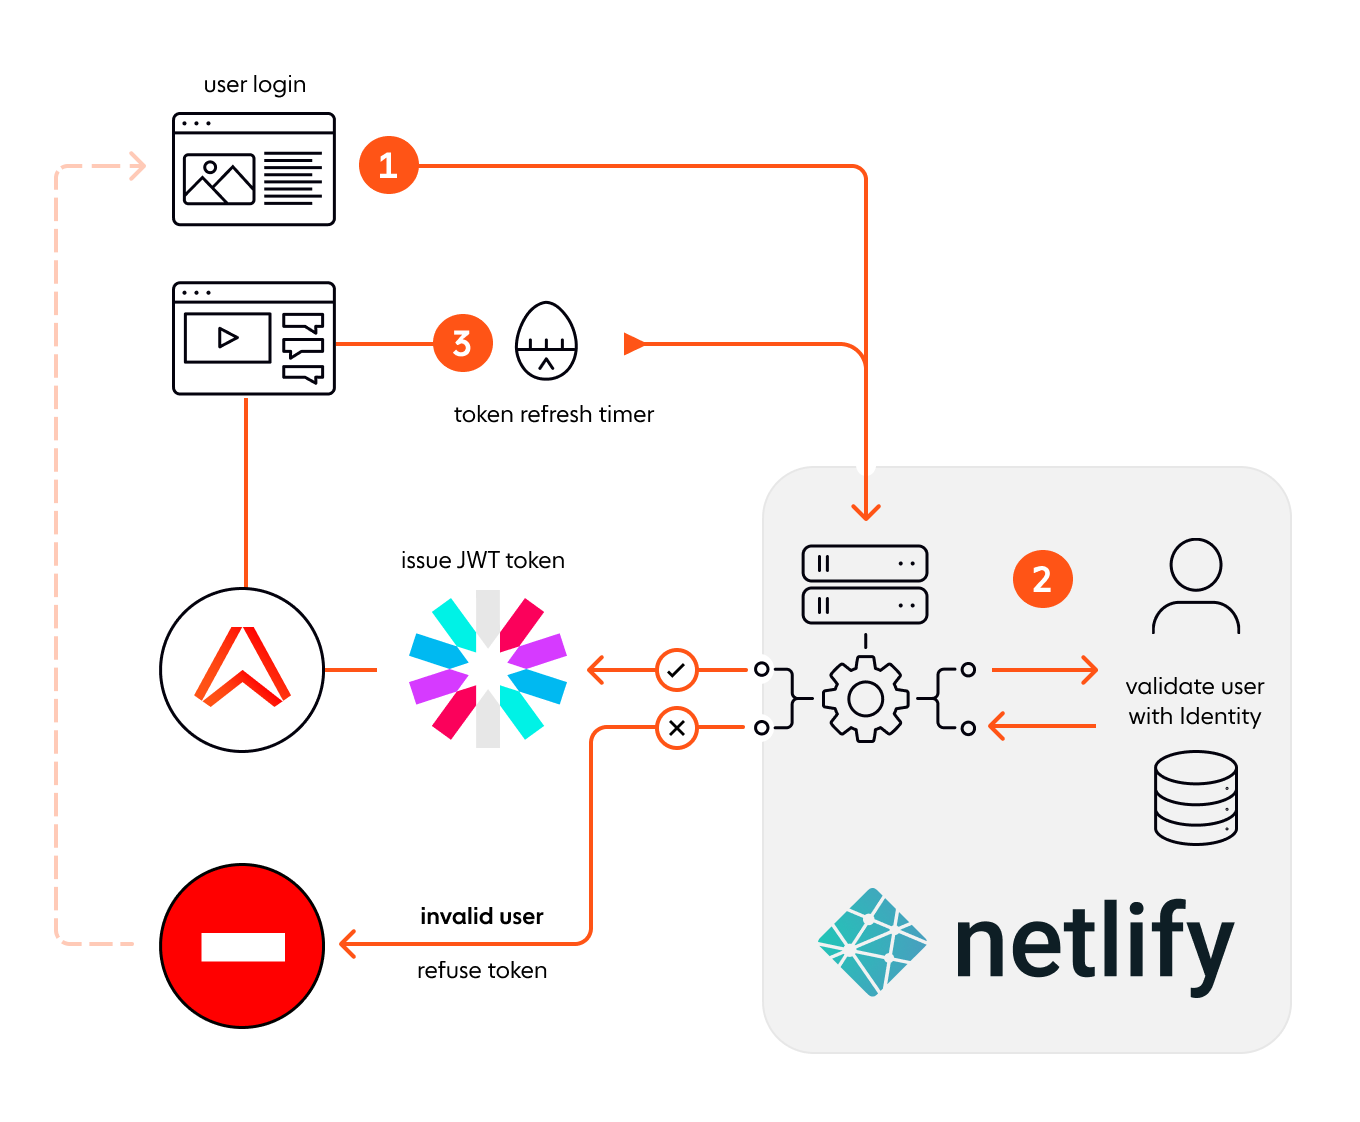
(1) User logs in → (2) Check user identity — valid users get JWT token, invalid users are rejected → (3) Use the token, wait for it to expire, then repeat.
The Netlify Identity allows us to administer users by editing metadata associated with their account. Flagging a bad actor is a matter of assigning them a role via the Netlify dashboard.
The JWT token as a serverless function
The key part of our JWT endpoint is this code snippet. Independent of platform, this part would be the same. This is the anatomy of the Ably JWT token, which differs from a standard JWT because we require additional key/values in the data payload:
function generateAblyJWT(props) {
    const { apiKey, clientId, capability, ttlSeconds } = props;
    const [appId, keyId, keySecret] = apiKey.split(/[\.\:]/g);
    const keyName = `${appId}.${keyId}`;
    const typ = 'JWT';
    const alg = 'HS256';
    const kid = keyName;
    const currentTime = Math.floor(Date.now() / 1000);
    const iat = currentTime;
    const exp = currentTime + ttlSeconds;
    const header = { typ, alg, kid };
    const claims = {
        iat,
        exp,
        'x-ably-capability': capability,
        'x-ably-clientId': clientId,
    };
    const base64Header = encryptObject(header);
    const base64Claims = encryptObject(claims);
    const token = `${base64Header}.${base64Claims}`;
    const signature = b64(SHA256(token, keySecret));
    const jwt = `${token}.${signature}`;
    return jwt;
}
The generateAblyJWT function is almost identical to the one in the Ably authentication documentation. We chose Netlify as the platform, but the same idea applies to any serverless endpoint: Cloudflare Functions, Runkit, Heroku, and so on.
Using Netlify Identity to validate users
This next function is the endpoint itself, and it connects with Netlify Identity to validate that the user calling the endpoint is trustworthy.
Note the line that builds userUrl. That is the Netlify endpoint we use to fetch the user by their ID. The id value comes from the querystring and is also baked into the Ably JWT as the clientId property — so both Ably and Netlify will share the same ID in their audit logs.
const axios = require('axios');
const generateAblyJWT = require('./generate-ably-jwt.js');

exports.handler = async function (event, context) {
    const { queryStringParameters } = event;
    const { id } = queryStringParameters || {};
    const { identity } = context.clientContext || {};
    const { token, url } = identity || {};
    const userUrl = `${url}/admin/users/${id}`;
    const Authorization = `Bearer ${token}`;

    let response;

    /*
        We use client context and the querystring ID
        to check the user exists. Then we inspect their
        metadata for role flags — if it contains "Banned"
        we do not reissue the token.
    */
    await axios
        .get(userUrl, { headers: { Authorization } })
        .then(({ data }) => {
            const banned = /^banned/i;
            const { roles = [] } = data.app_metadata;
            const reject = roles.some((item) => banned.test(item));
            if (reject) throw new Error(`User with id [${id}] has been banned`);

            const settings = {
                clientId: id,
                apiKey: process.env.ABLY_APIKEY,
                capability: process.env.ABLY_CAPABILITY,
                ttlSeconds: Number(process.env.ABLY_TTLSECONDS),
            };
            response = {
                statusCode: 200,
                body: generateAblyJWT(settings),
                headers: { 'Content-Type': 'application/jwt' },
            };
        })
        .catch((error) => {
            response = {
                statusCode: 500,
                body: `Internal Error: ${error}`,
                headers: { 'Content-Type': 'text/plain' },
            };
        });

    return response;
};
The exported handler is a modified version of Netlify's "hello world" tutorial. The key changes: it is integrated with Identity, and the response header is Content-Type: application/jwt rather than application/json.
Note that the expiry time must be cast as Number(). If anything is incorrect the Ably realtime network will provide a diagnostic error message. The function also loads CryptoJS for encryption.
A summary of the front-end setup
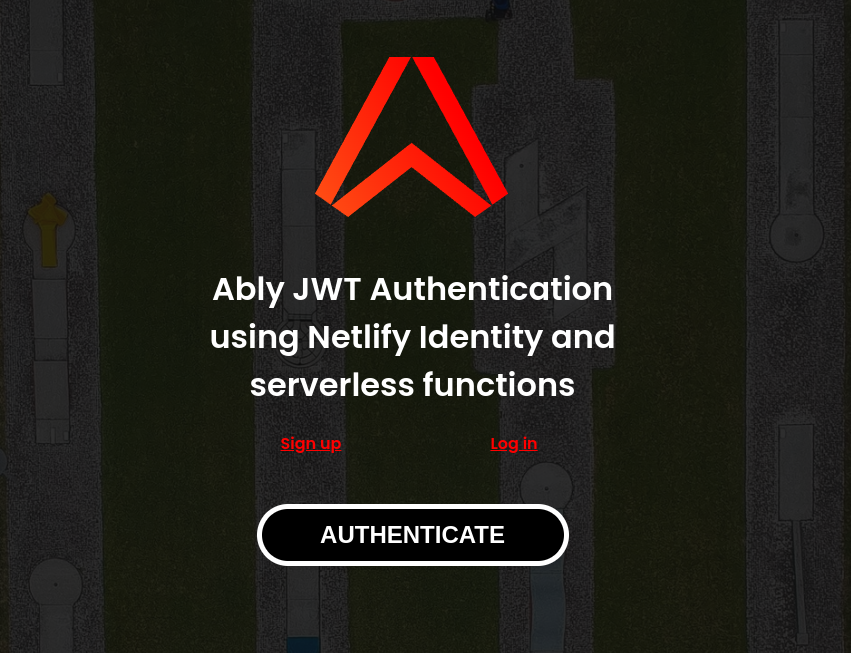
The modal pop-up (registration, login, and password reminder) is governed by a single <div> and a JavaScript widget from Netlify:
<div data-netlify-identity-menu></div>
And the AUTHENTICATE button executes this function:
function go(el) {
    // Get the user id from localStorage — only populated after login.
    const user = localStorage.getItem('gotrue.user') || null;
    if (!user) {
        showMessage("Can't access user ID, please log in first.");
        return null;
    }

    // Bind the user's identity ID to the authURL so that Ably
    // carries the same clientId through token refreshes.
    const { id } = JSON.parse(user);
    const { origin } = window.location;
    const authUrl = `${origin}/.netlify/functions/ably-jwt?id=${id}`;

    window.ably = new Ably.Realtime({ authUrl });
    window.ably.connection.on(handleConnection(el));
}
Once the client connects, Ably starts a countdown based on the TTL in your environment variables. When it expires, the same auth URL is used to request a fresh token.
Okay, okay, enough … let's ship it!
Preparation
Fork the repo from ably-labs/netlify-identity-auth to your own account. Log in to Ably and create a new app — you will need the API key shortly.
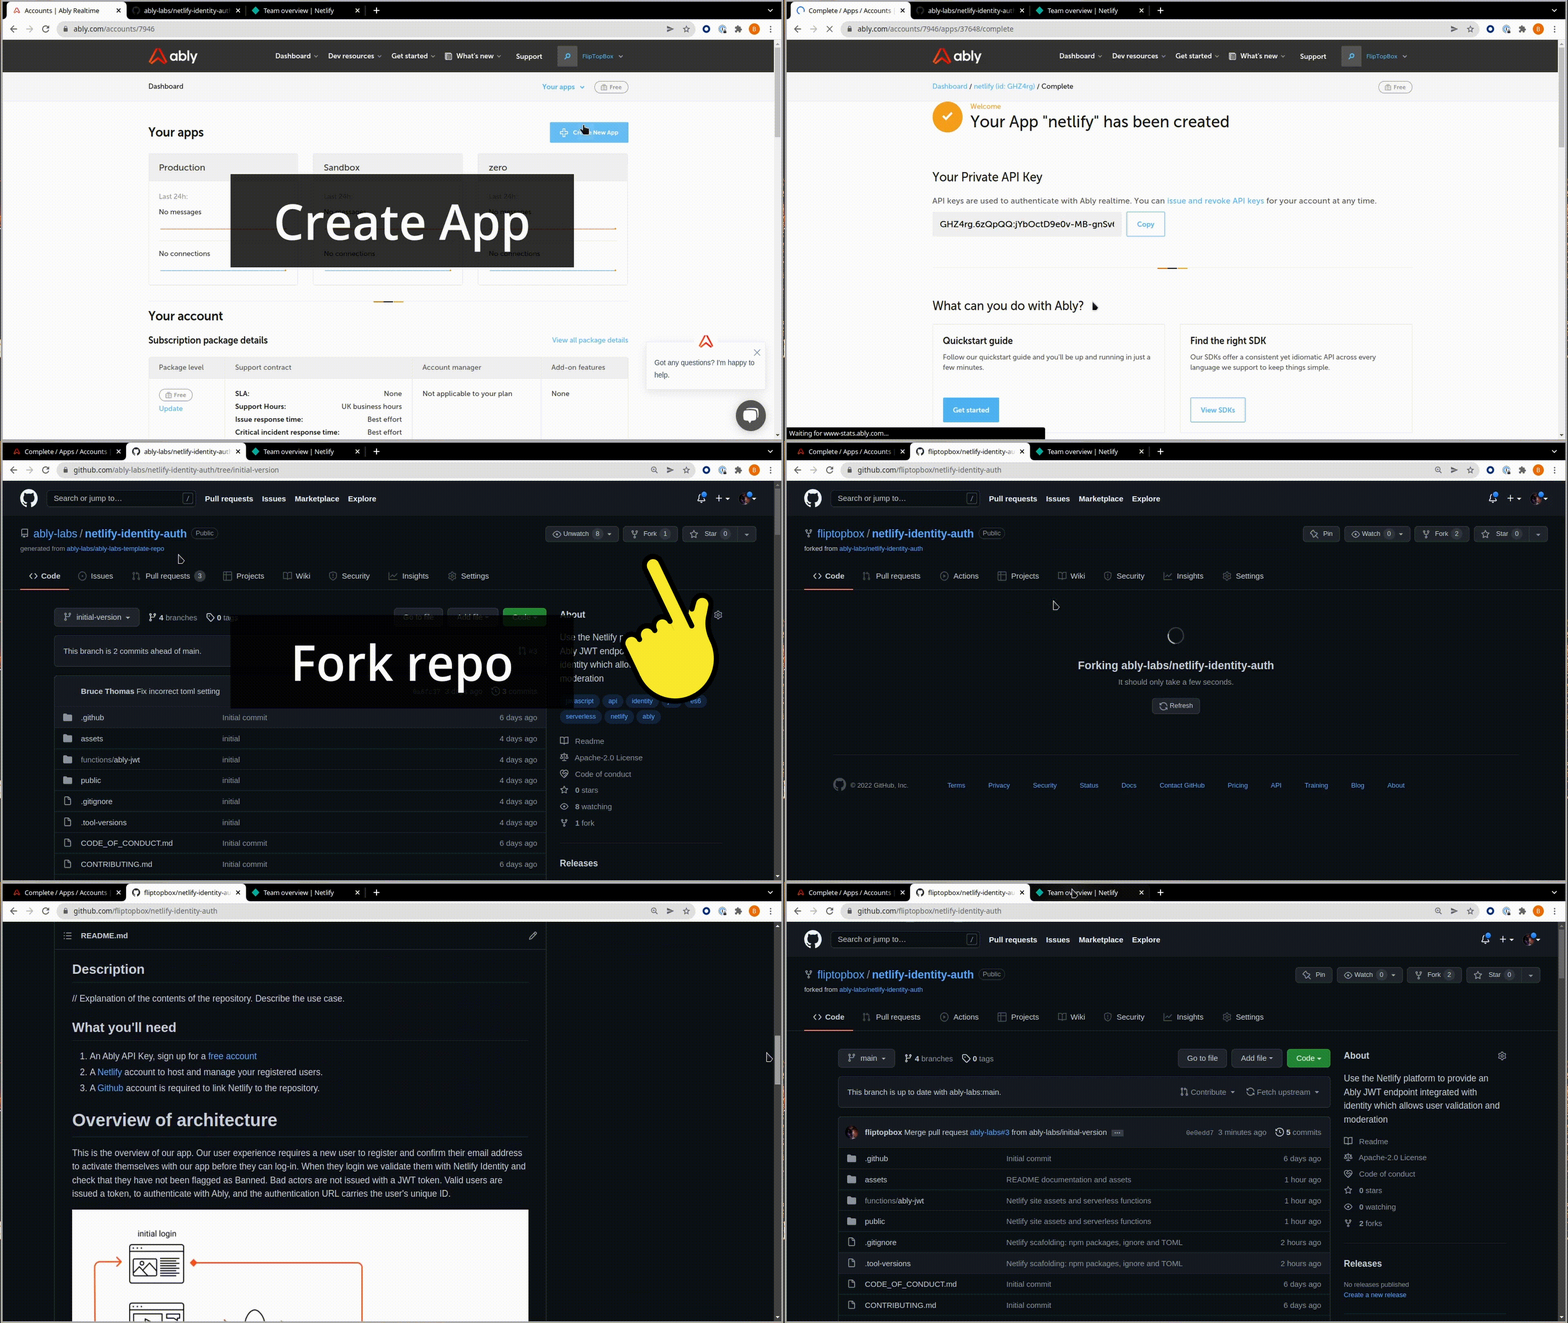
Deploy and set up Netlify services
Import the forked repo into Netlify and deploy. Enable Netlify Identity in the dashboard. Users must register and confirm their email before they can authenticate — this can be bypassed if you prefer.
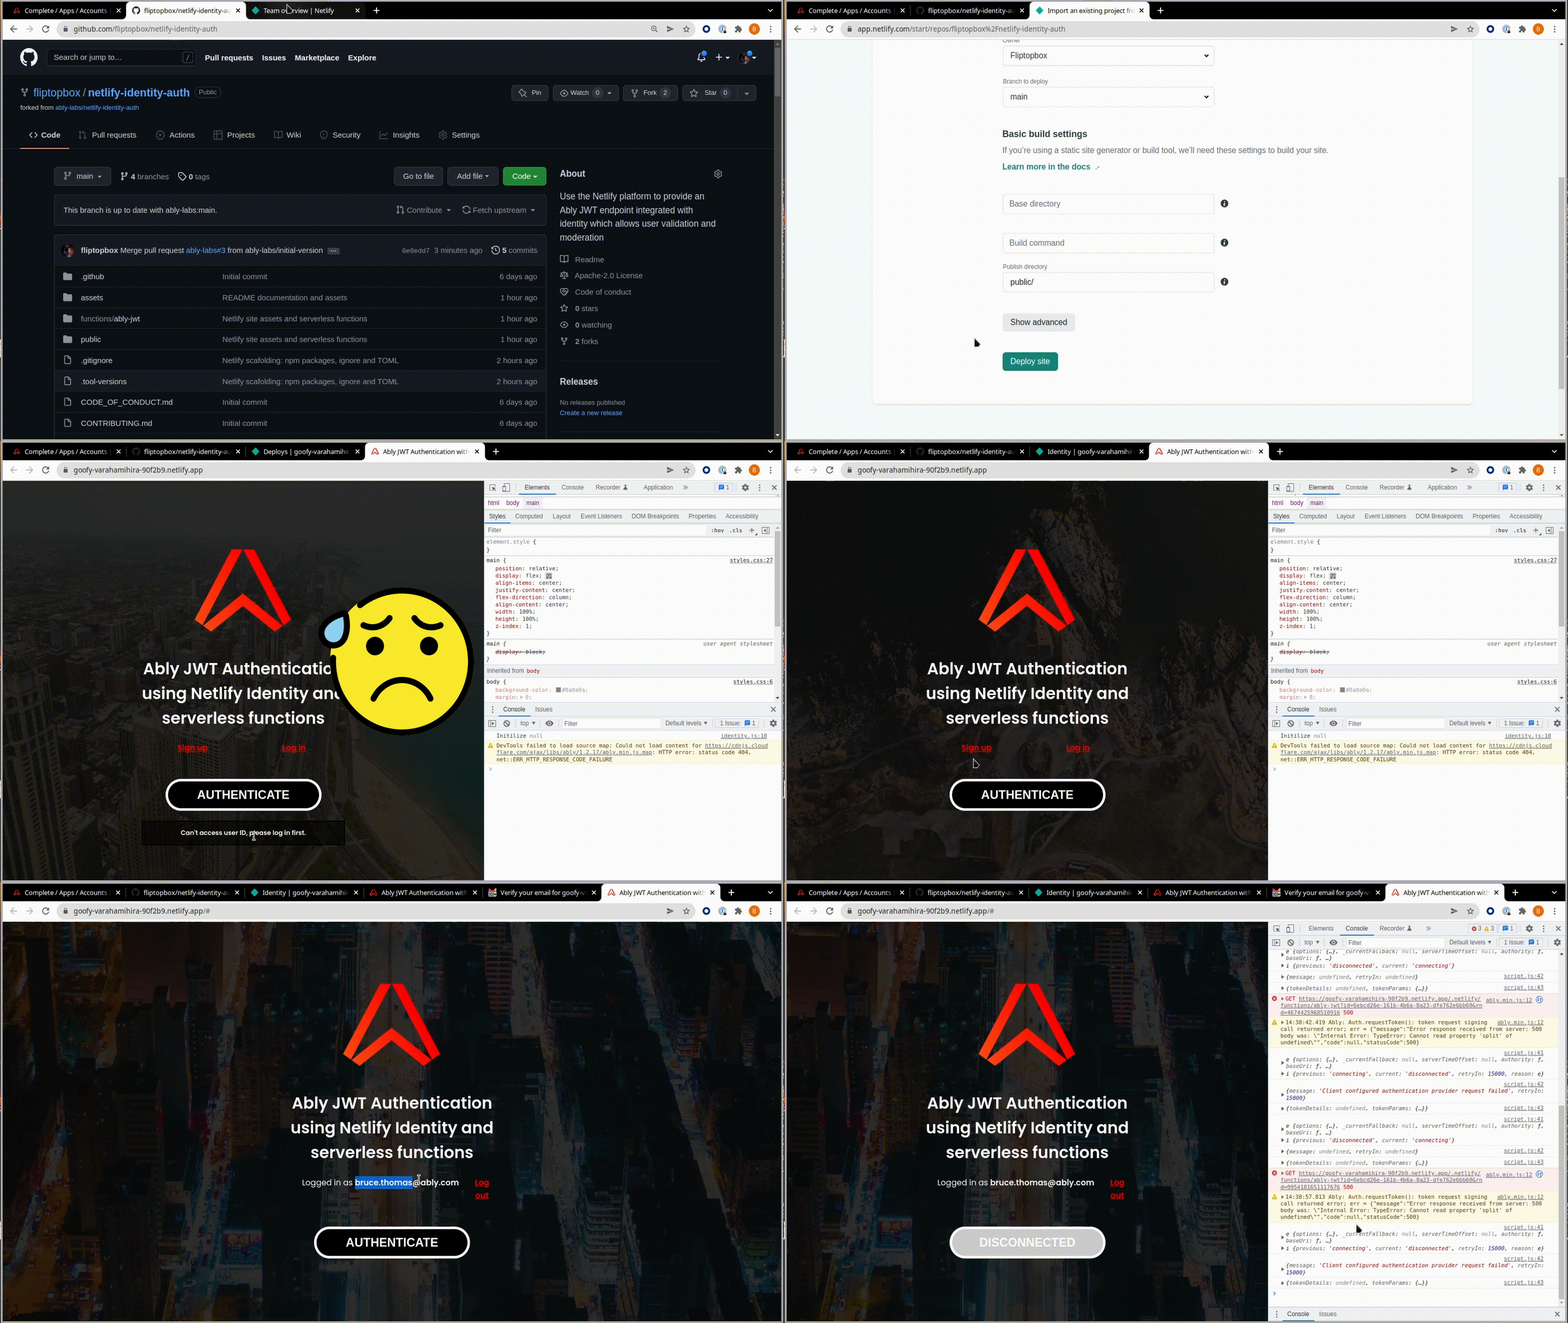
Add the environment variables
| Key | Type | Description |
|---|---|---|
ABLY_APIKEY |
String | The API key of your Ably app |
ABLY_CAPABILITY |
String or Null | JSON permissions, e.g. {"channel-name":["subscribe"]} |
ABLY_TTLSECONDS |
Number | Token refresh rate in seconds, e.g. 3600 |
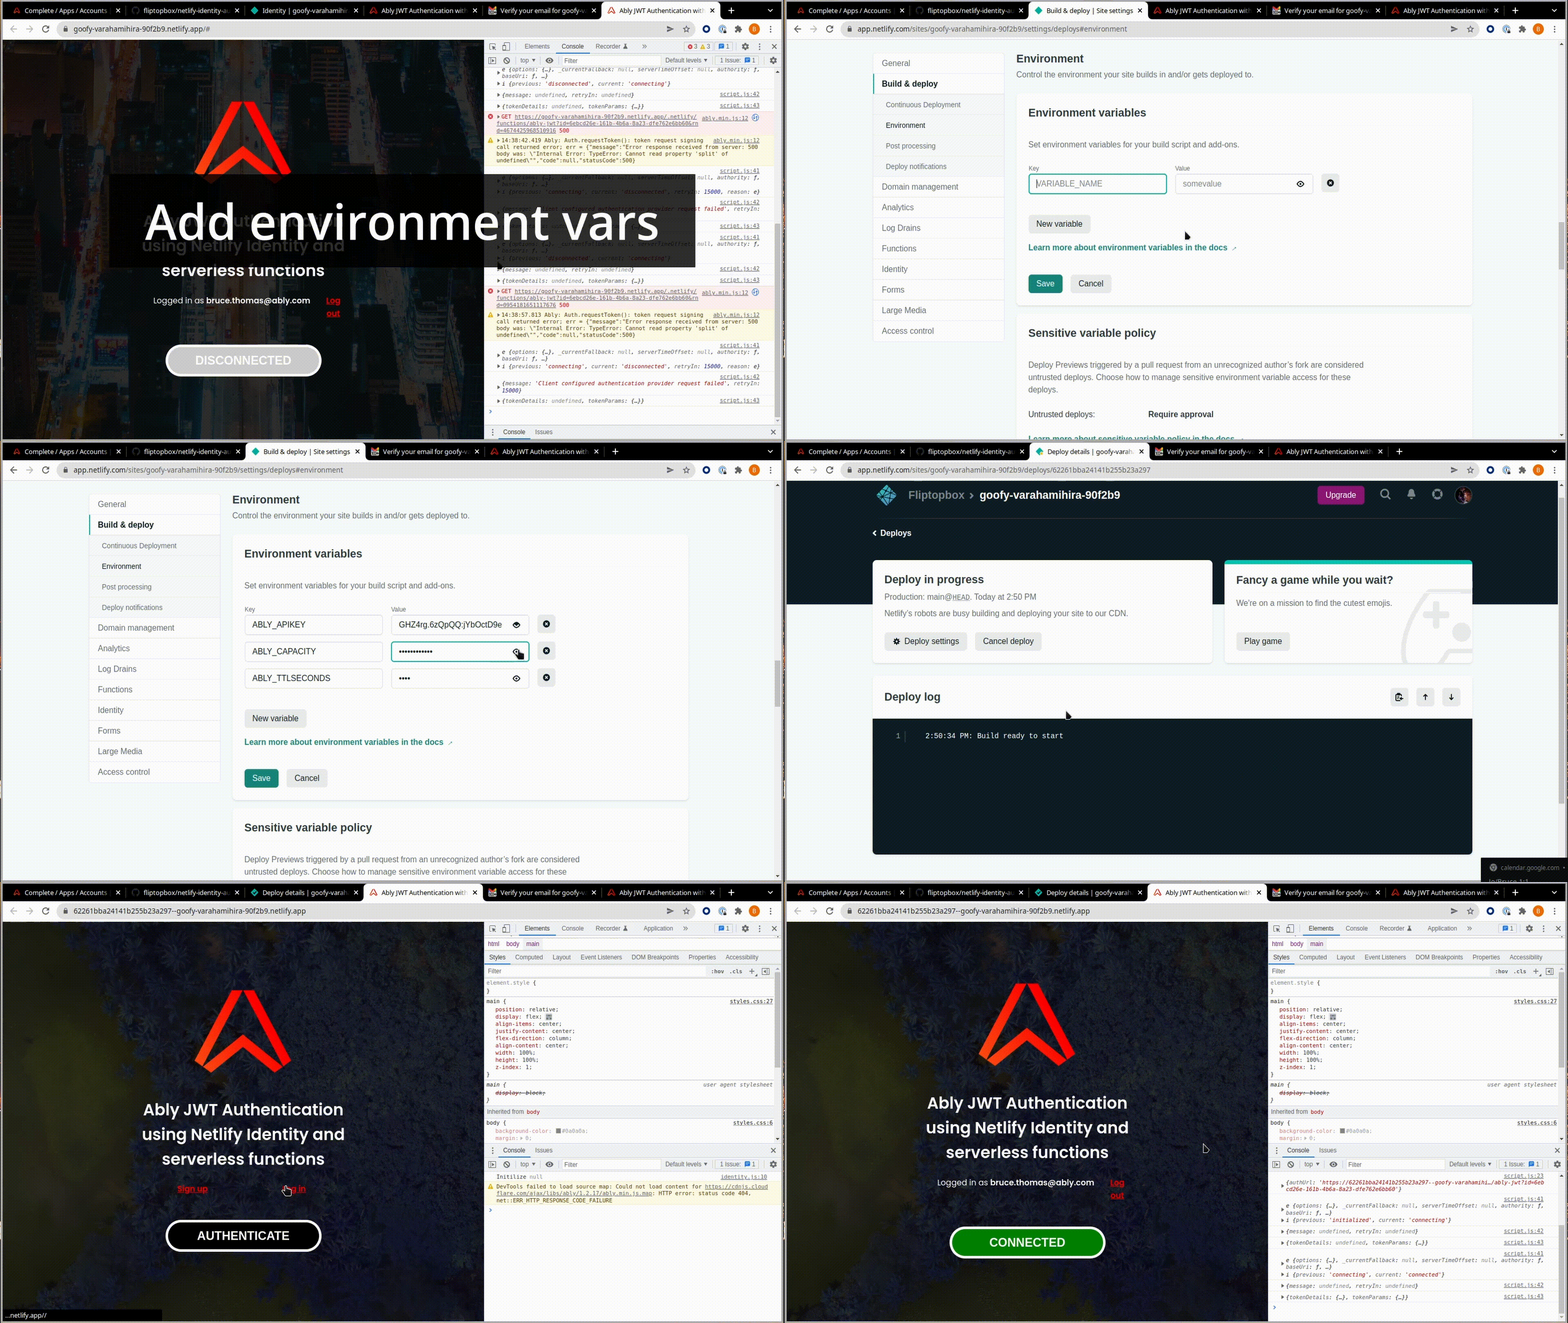
After adding the variables and re-deploying, the authenticate button should turn green — the user has been issued a JWT token and is connected to the Ably realtime network.
User moderation
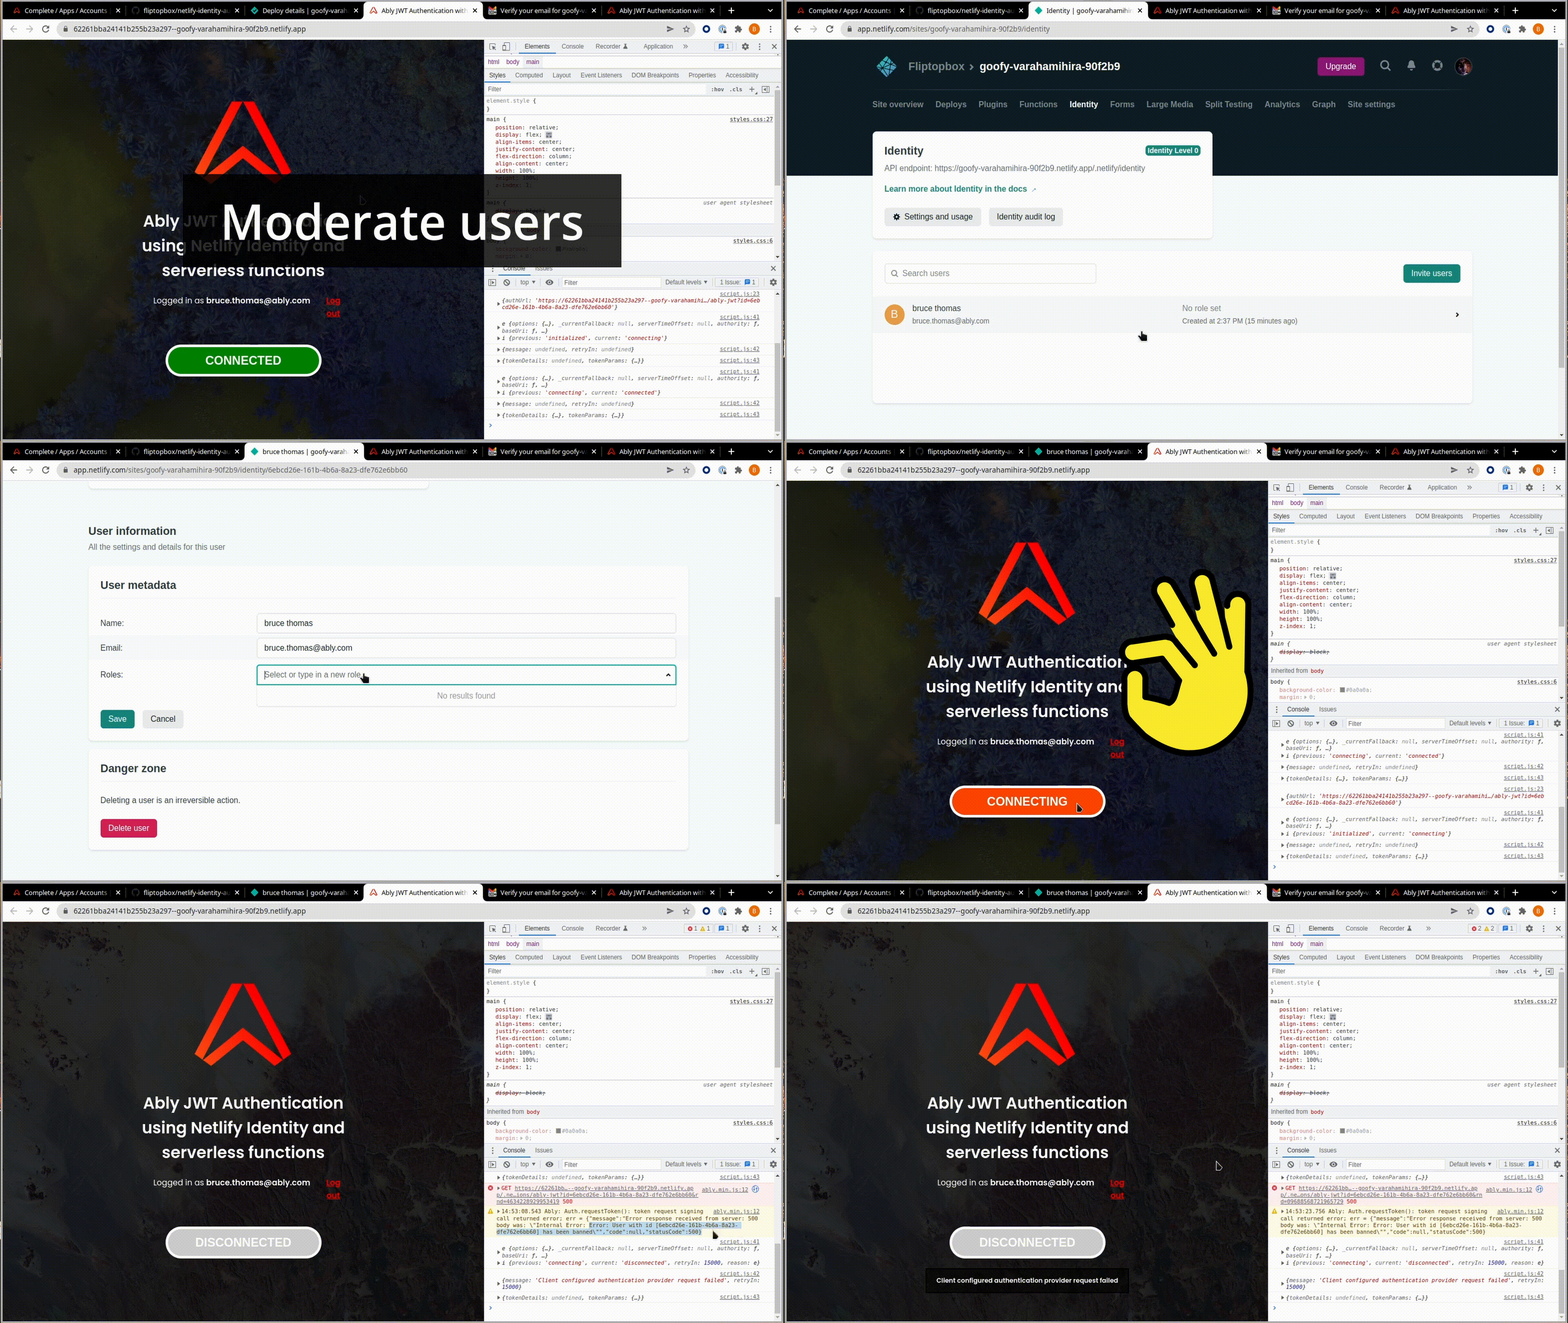
To ban a user, open the Identity dashboard, find their record, and add "Banned" to the roles property in their app metadata. From that point the endpoint will refuse to reissue a token.
Cleanup and teardown
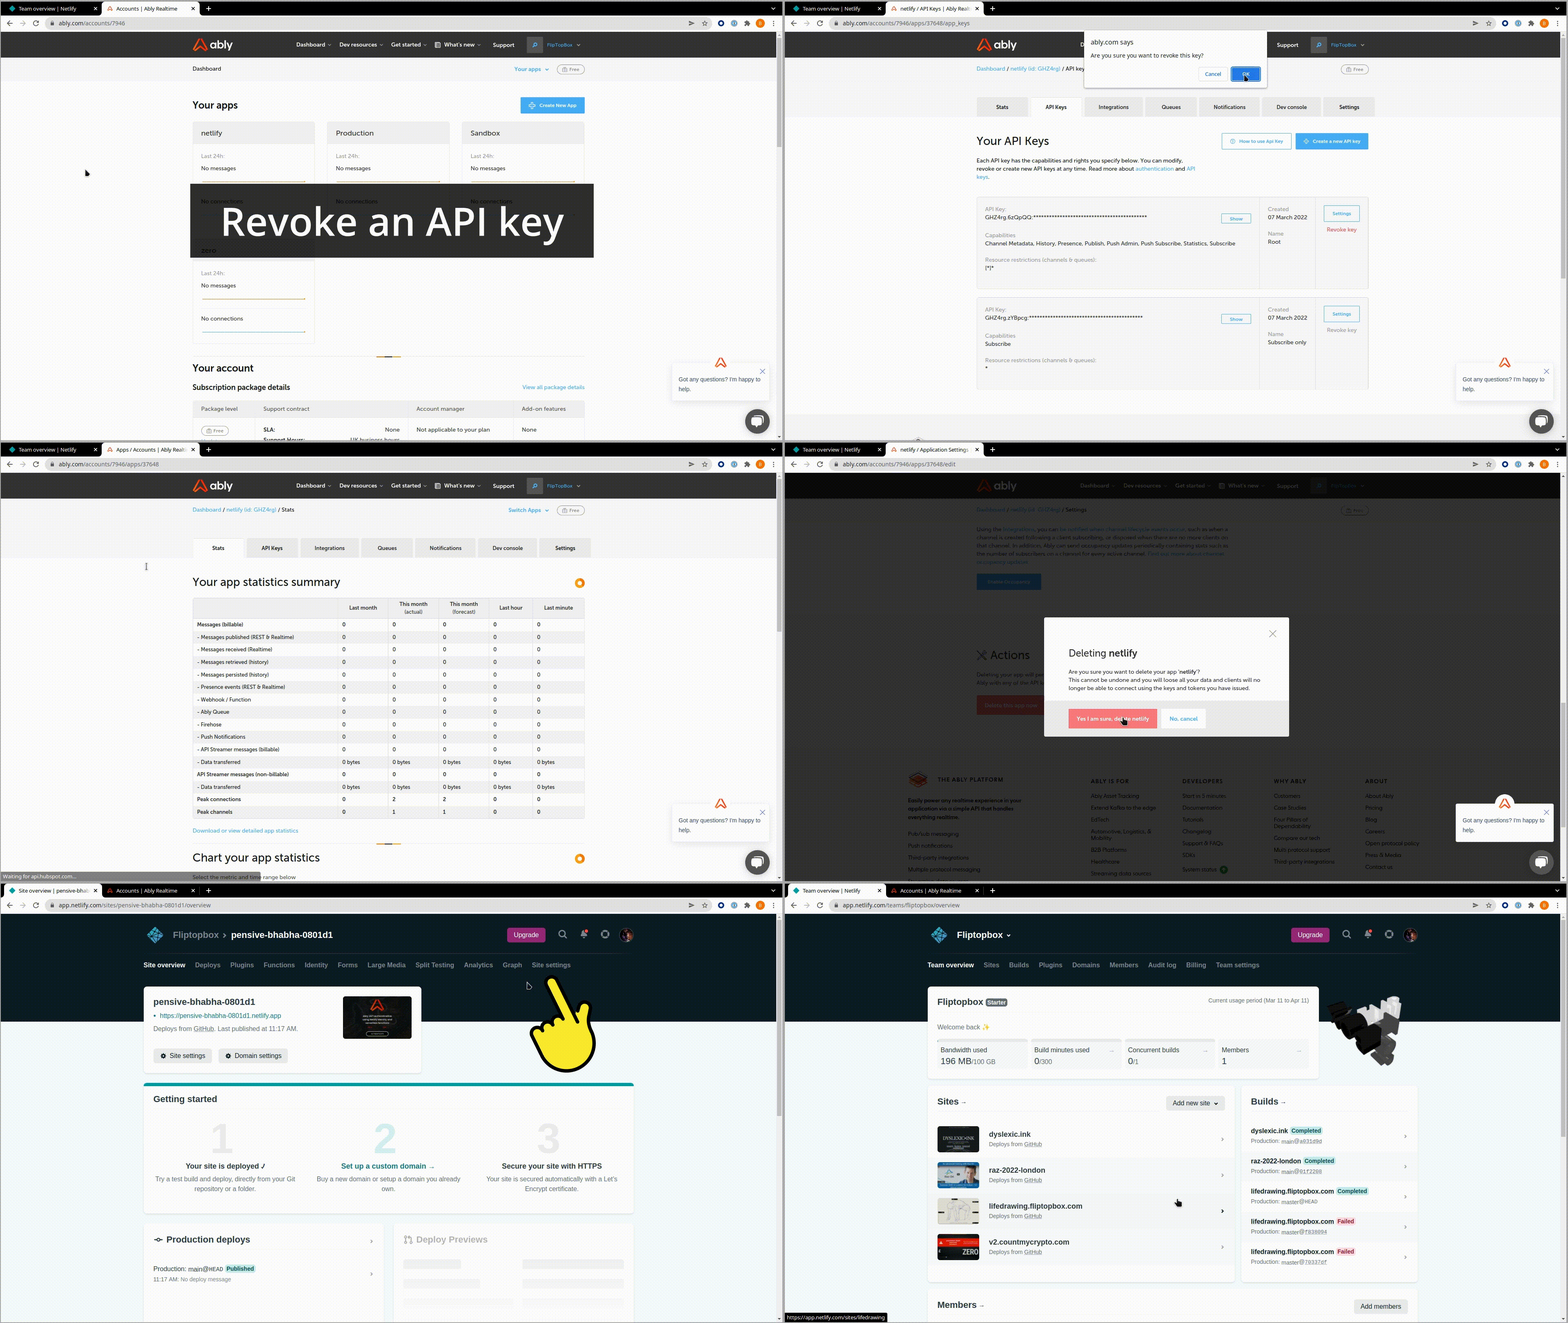
When you are finished with the demo, remove it securely — either by revoking the API key (preserves the app, destroys the key) or by deleting the app entirely.
Ably in a nutshell
Ably provides APIs to implement pub/sub messaging for realtime features. You also get globally-distributed, scalable infrastructure out of the box, along with presence, automatic reconnection, guaranteed message delivery, and third-party integrations — primarily over WebSockets.
Tools to limit your exposure
- gitguardian — scans your source code for API keys, passwords, and certificates in realtime
- GitHub Actions secret scanning — environment protection rules and secrets
- GitHub Secret Scanning Partners — prevents fraudulent use of accidentally committed secrets
- Global .gitignore —
git config --global core.excludesfile ~/.gitignore_global - jwt.io — JSON web token generator and debugger